Transcribing interviews with Nexus365
Introduction
Recording an interview is convenient way to save notetaking and lets you concentrate on asking questions and responding to the interviewee's answers. Whether offline or online, a video or audio recording will contain personally identifiable information, even if that is just the voice or face of the interviewee. So you should assume that the recording files are personal data and only store them in suitable secure storage. Transcribing interviews automatically is very powerful and time saving, but it is important that both the recording and transcript are stored and processed in an information security-compliant way. If you are using your mobile device, ensure that you secure it as per the InfoSec guidance.
As the Nexus365 platform has been assessed as secure for all classifications of University data, it is possible to make use of the automatic transcribing feature of Microsoft Stream or Word online to do this at no cost.
Step by step how-to guides
Microsoft Word (free to use via Oxford's Nexus365 subscription to Microsoft 365) has an automatic transcription feature. This offers a number of advanced features, such as identifying each speaker's voice and labelling the words they say.
You can either make the recording live on your device, or upload a recording you made earlier. The live transcriptions are unlimited in length, but when uploading a recording, there is a five-hour limit per user per month, and each uploaded recording is limited to 200MB. More than eighty languages are supported.
Both ways of using this feature are described in detail in Microsoft's support materials - or see the introductory video below.
Install the Stream app on your mobile device – there are apps for both Android and iOS (Apple).
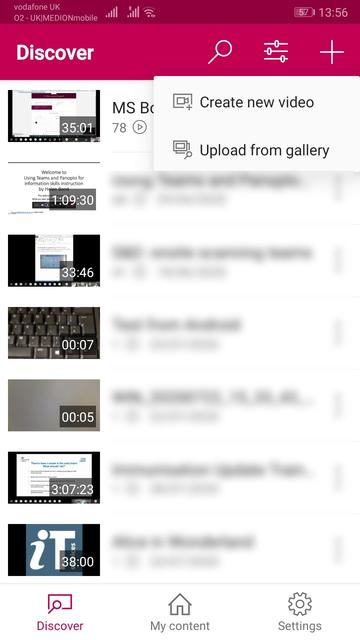
The first screen is the 'Discover' screen: this will show you existing videos which other people in Oxford have shared to the whole organisation. Touch the plus icon on the top right and select 'Create new video':
You will be taken to a video recording screen, similar in functionality to the one your phone came with.
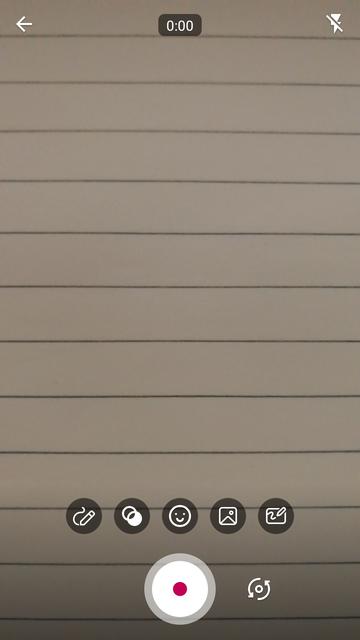
Touch the magenta record button at the bottom. Here I am just seeing the notebook on my desk, as I am only interested in recording the audio. I speak into the phone 'The quick brown fox jumped over the lazy dog' as an example.
To stop recording, press the recording button again (it will show the pause symbol ||). Press the magenta ► button to continue.
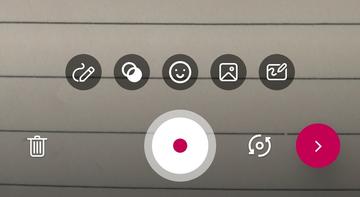
You can select a subsection of the video to upload on the next screen, or just click 'Upload'. You can now give your recording a file name and description. It is also possible to select the language, which should be set to the language spoken in your interview.
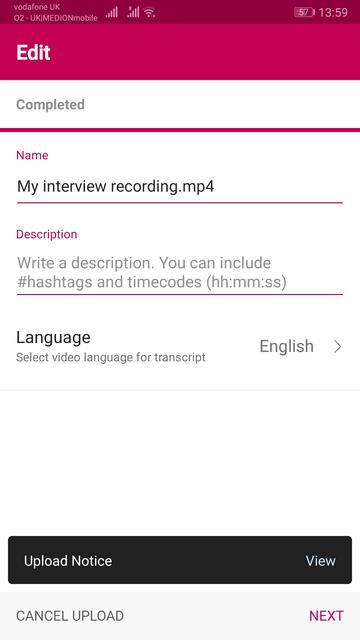
Click 'NEXT'. Here you must not change the default setting on the 'Public within your company' option, as otherwise anyone in Oxford could access the interview!
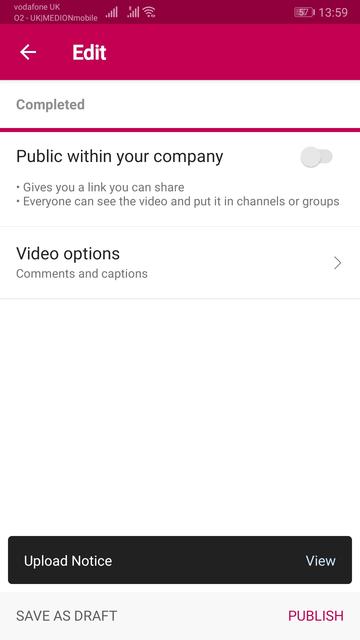
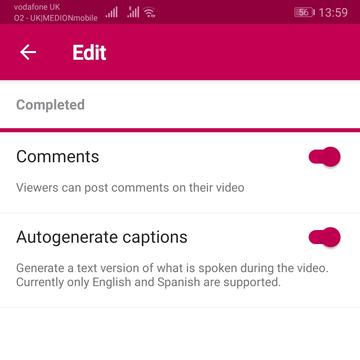
Select the 'Video options' submenu, where you can check that 'Autogenerate captions' is enabled.
Press the back arrow at the top left, and you should see 'Completed' at the top of the screen to indicate the video has been uploaded successfully.
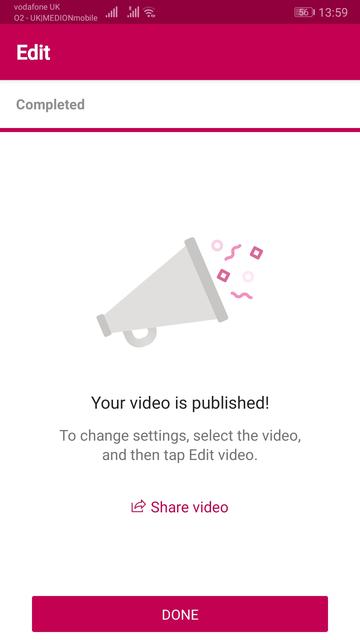
You will receive an email notification when your video has finished processing. This process could take a few minutes if your video is particularly long.
Press 'DONE', then go to a web browser on a laptop / desktop computer and go to the Microsoft Stream website.
You may be asked to log in using your SSO credentials if you are not already logged in to Microsoft.
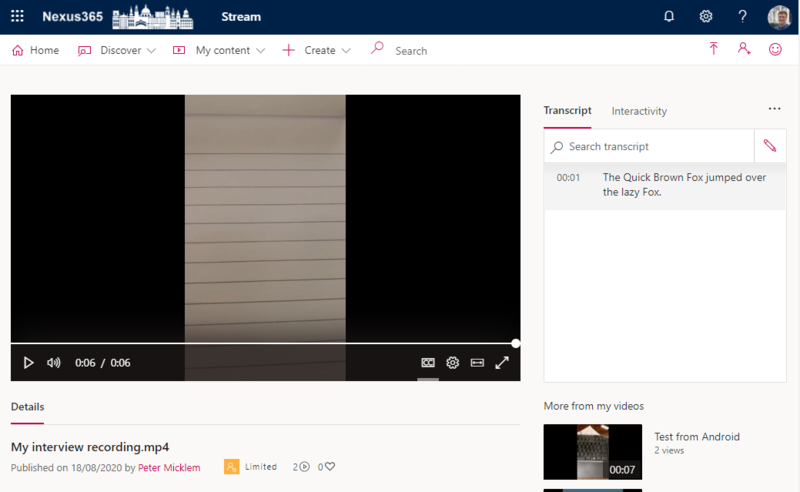
Here you can see your recording has been uploaded, with the transcript visible on the right hand side. You should also see 'Limited' at the bottom next to your name, indicating that this video is not shared across the whole 'company' - in this case, the University of Oxford.
As Stream’s transcription feature is principally designed to improve accessibility and searching of videos (using words in the transcript) it is necessary to modify an audio-only file to allow it to be uploaded to Stream. If you don’t do this, and attempt to upload an MP3 file for example, it will be rejected as an unsupported format. To convert an audio file into a video file, see the instructions below.
You can check the limits on the number of videos for Stream, but this was 5,000 per user at the time of writing, which should be sufficient for most research projects.
Go to the Microsoft Stream website, select '+ Create', and then 'Upload video':
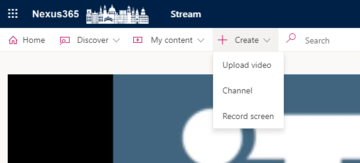
Select a suitable video file containing your interview recording as the audio track. By default, the videos are kept private to your user account only. Make sure you do not click the 'Make video available to my organisation' option, as this will publish the video to the whole University!
It will take a few minutes to process the video, you will receive a notification when it is finished.
Once the processing is complete, go to 'My content' and select the video. If your window is wide enough, you will see the transcript on the right of the video:
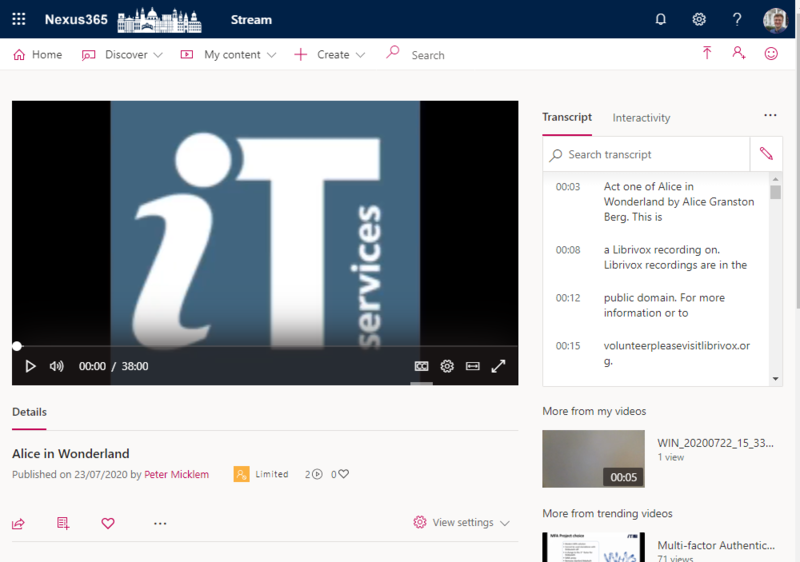
You can listen to the recording in Stream to check that the transcription is accurate. You can correct any sections which are incorrect using the pencil icon next to the 'Search transcript' box. It is easy to edit the transcript here, as you can easily replay any sections where the audio isn’t clear and correct them in place.
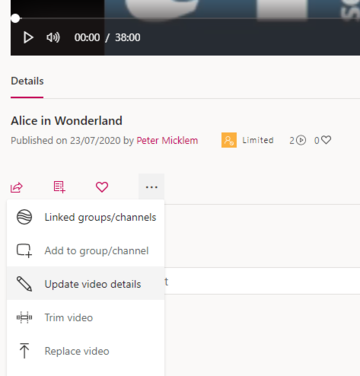
To download the whole transcript in one file: below the video portal is a 'Details' tab. Click on the ellipsis (three dots) icon to the right of the heart icon. Select 'Update video details'.
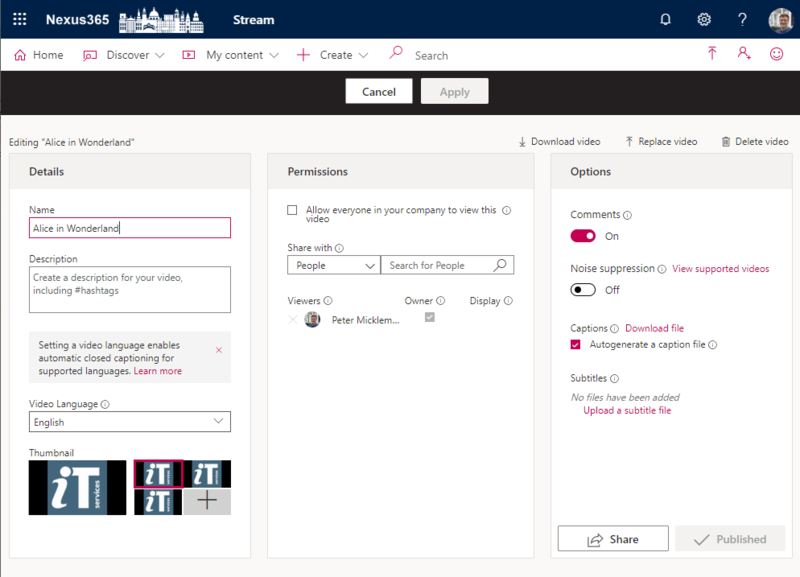
In the right-hand column, called 'Options' there is a link labelled 'Download file', next to 'Captions'.
When you click this, a file will be downloaded in Web VTT format. This format is useful in that it stores a timecode next to each sentence and will give the confidence figure for each phrase in the transcribed text. There are tools available which will strip these timecodes and metadata out, if you don’t want it.
There are several tools which could do this – here we will show you a method using Microsoft Photos, which is an app built in to Windows 10.

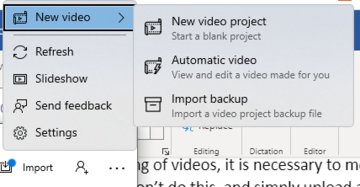
Click on the three dots to the right of the screen and select 'New video project':
Next give your new video a name:
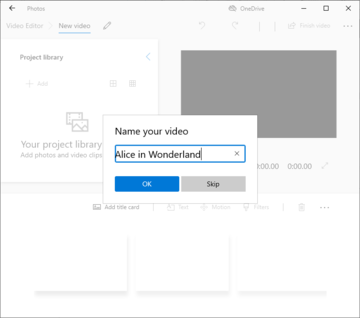
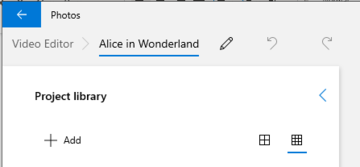
Next we need to add a photo to the Project Library in order to add it to the new video project:
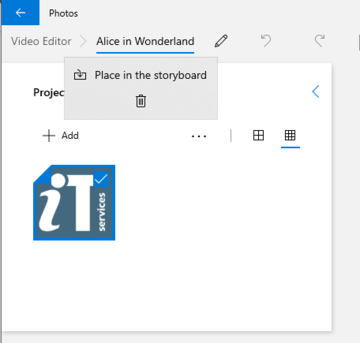
Pick any image file you like – this will be uploaded to Stream as the video: here I have used the IT Services logo. Then click to select the image using the checkbox in the top right corner, click the three dots, and select 'Place in the storyboard' from the menu.
You should now see the image placed in the video preview section of the window on the right:
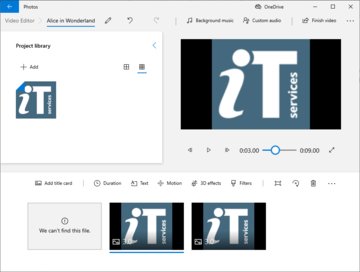
Click the 'Duration' button and set the duration to the number of seconds. So if your audio recording is 38 minutes long, that is 38 x 60 = 2280 seconds.
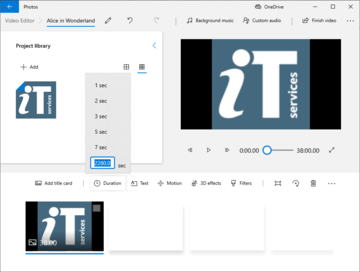
Now click 'Custom audio' above the video preview window:
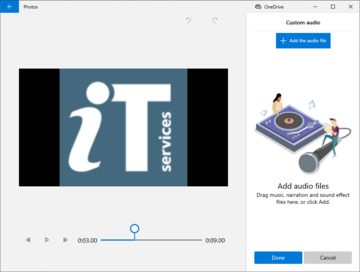
Add your recorded interview by clicking '+ Add the audio file' and selecting your audio file. It will appear on the right-hand side of the window. Then drag out the blue bookend sliders to ensure that the whole of your audio recording is included (this is why the duration of the video needs to match).
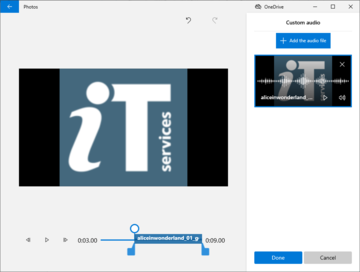
Click the 'Done' button to return to the main window.
So we now have a video project which contains an image which will be used to create a Stream-compatible video file, and your audio file as the 'custom soundtrack'. Click 'Finish Your Video' - choose the low video quality as it saves space and speeds up the upload process.
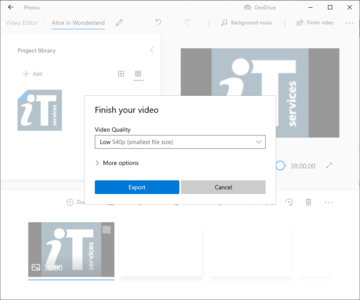
Click 'Export' and save the file to a location ready for upload to Stream. Note the file extension is now MP4, signifying a video file.
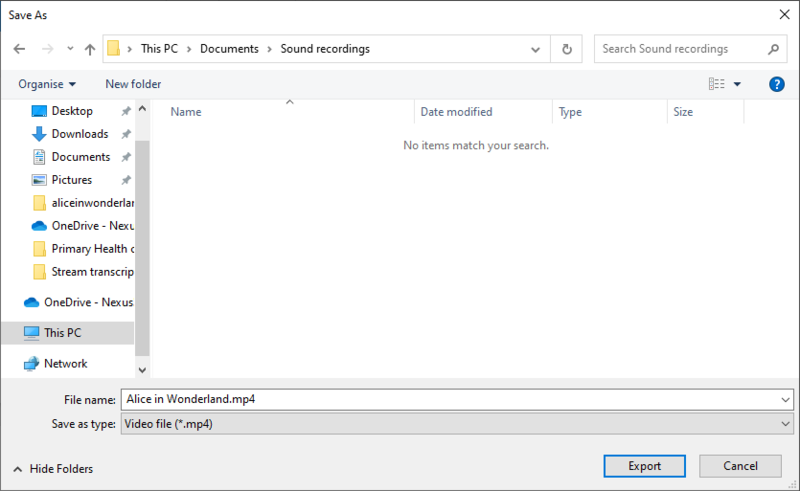
Click 'Export'. It will take a few minutes if your recording is long:
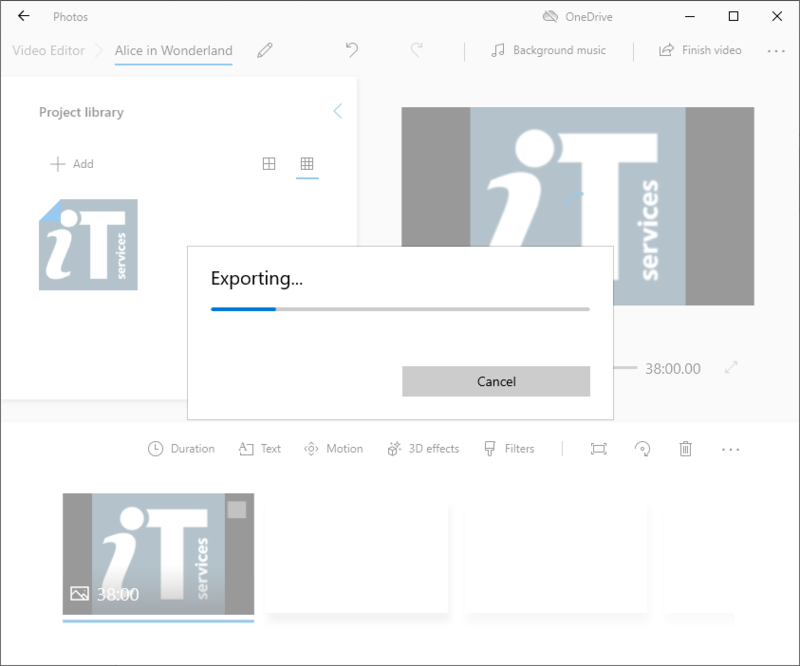
This will result in an MP4 file ready to upload to Stream for transcribing - see 'Uploading a video in the web version of Stream' above.


